How to Choose an Ultralight Backpack for Backpacking
Learning how to choose an ultralight backpack is a fit-and-load decision—not a hunt for a mythical “best” pack on a podium. Capacity, torso length, frame vs frameless, and the weight you will actually carry matter more than catalog grams or forum winners.
This page is a choose / framework guide: match the pack to your kit and trips, then stop shopping—not a ranked product list or brand shootout. Cut shelter and sleep first, know your base weight, then buy a pack sized for that load. Map the kit in Pack Builder so the container follows the contents. Kit map before ounce-chasing: essential backpacking gear checklist.
Key takeaways
- Choose by capacity + torso fit + load range—not “lightest pack” headlines or #1 lists; carry ability and fit beat empty grams.
- Size volume to trip length and kit size; oversizing invites stuffing and sore miles.
- Measure torso fit before you chase ounces—fit beats grams every time.
- Match frame vs frameless to real ultralight backpack load, not an aspirational base weight.
- Buy the pack after shelter/sleep cuts; do not buy frameless for a heavy traditional kit.
- Know when NOT to go UL pack—heavy loads, unfinished kit cuts, max comfort needs—then log candidates in Pack Builder.
What “ultralight backpack” means
There is no governing body that certifies an ultralight backpack. Hikers use the phrase for packs that are light for their capacity and built around leaner kits—simpler suspension, lighter fabrics, fewer luxury pockets than expedition bags.
What “ultralight” does not mean: that the pack alone makes you ultralight (base weight is a kit number); that lighter always equals more comfortable; or that every weekend needs a frameless race vest.
Treat pack weight as one input. Hip/shoulder comfort, how a full load rides, and volume match matter more than another empty-shell ounce. Base vs worn vs consumable definitions live in the ultralight base weight guide. Soft class examples (framed UL vs frameless) are fine; no brand wins a podium. The honest answer to “best ultralight backpack” is the one that fits your torso, carries your real load, and matches your trips.
Capacity (volume vs trip length / kit size)
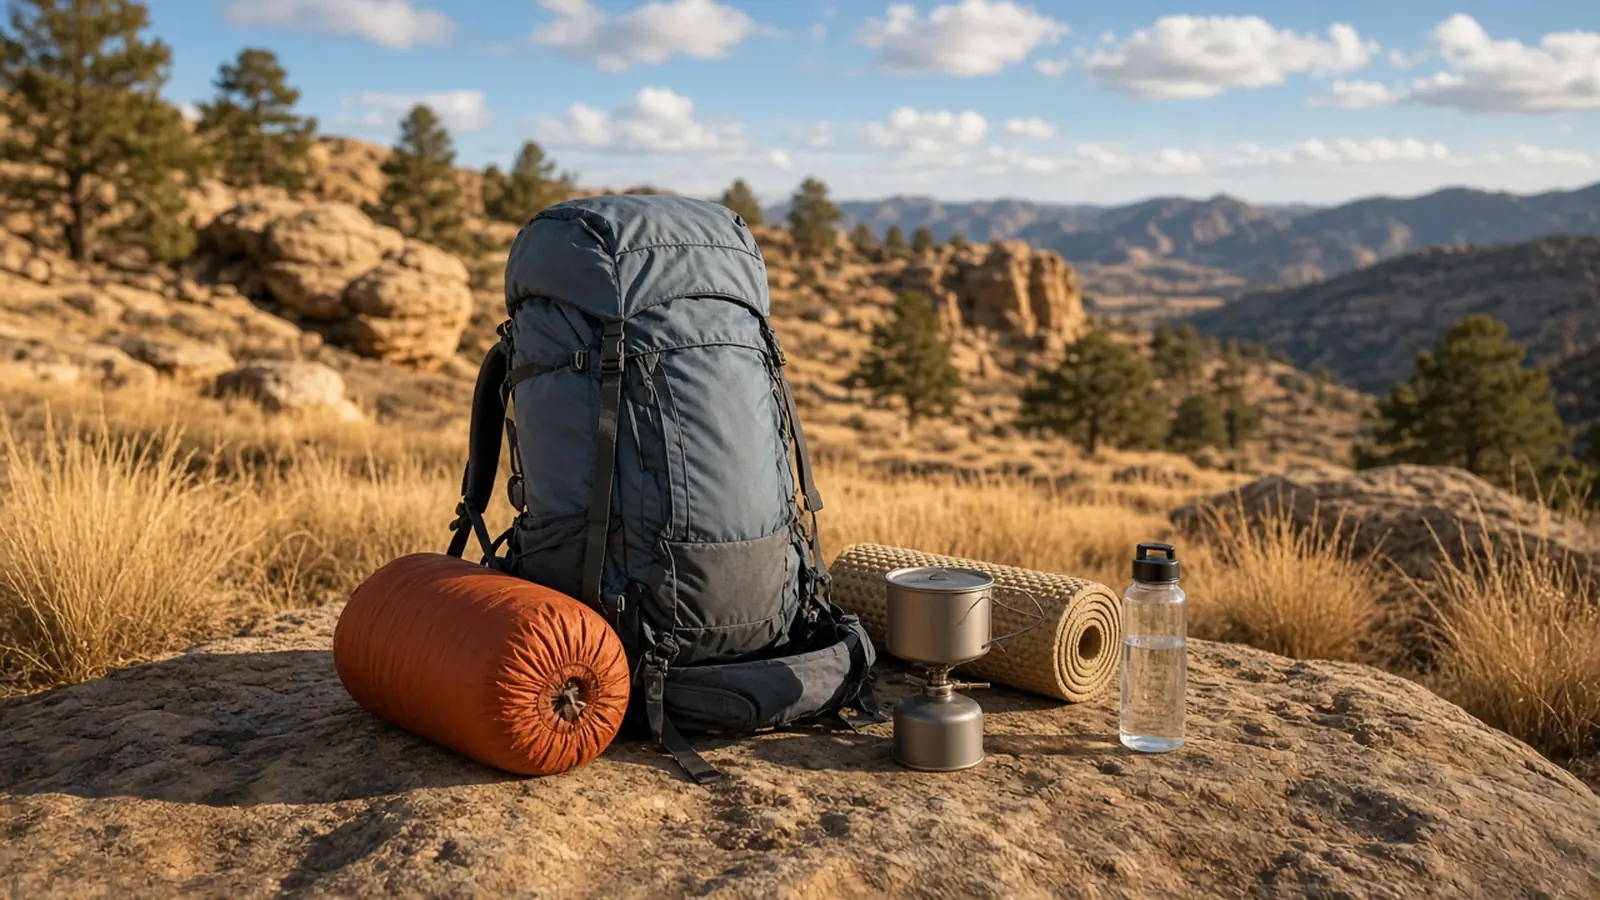
Ultralight backpack capacity is usually listed in liters. Use it as a volume budget for shelter + sleep system + packed clothing + food + cook hardware + small systems—not as a status number.
Rough framing (conventions, not rules):
- Short overnight / lean weekend — often a smaller volume works if shelter and sleep compress well and food is light.
- Multi-day / longer food carries — more liters for consumables and bulkier cold-weather clothing.
- Shared gear or bulky traditional kits — more volume even when weight is “okay,” because soft goods still take space.
Oversizing problems: Extra empty liters invite “just in case” stuffing, a sloppy load that sags, and a pack that feels unstable even when the scale looks fine. Undersizing forces external straps, crushed insulation, and miserable packing every morning.
Choose capacity for the kit you will carry on typical trips, not a fantasy loadout you have not built. If shelter and sleep still dominate bulk, fix those first: How to Choose an Ultralight Tent, Are Ultralight Tents Worth the Investment?, and the sleeping bag guide.
Torso fit and sizing
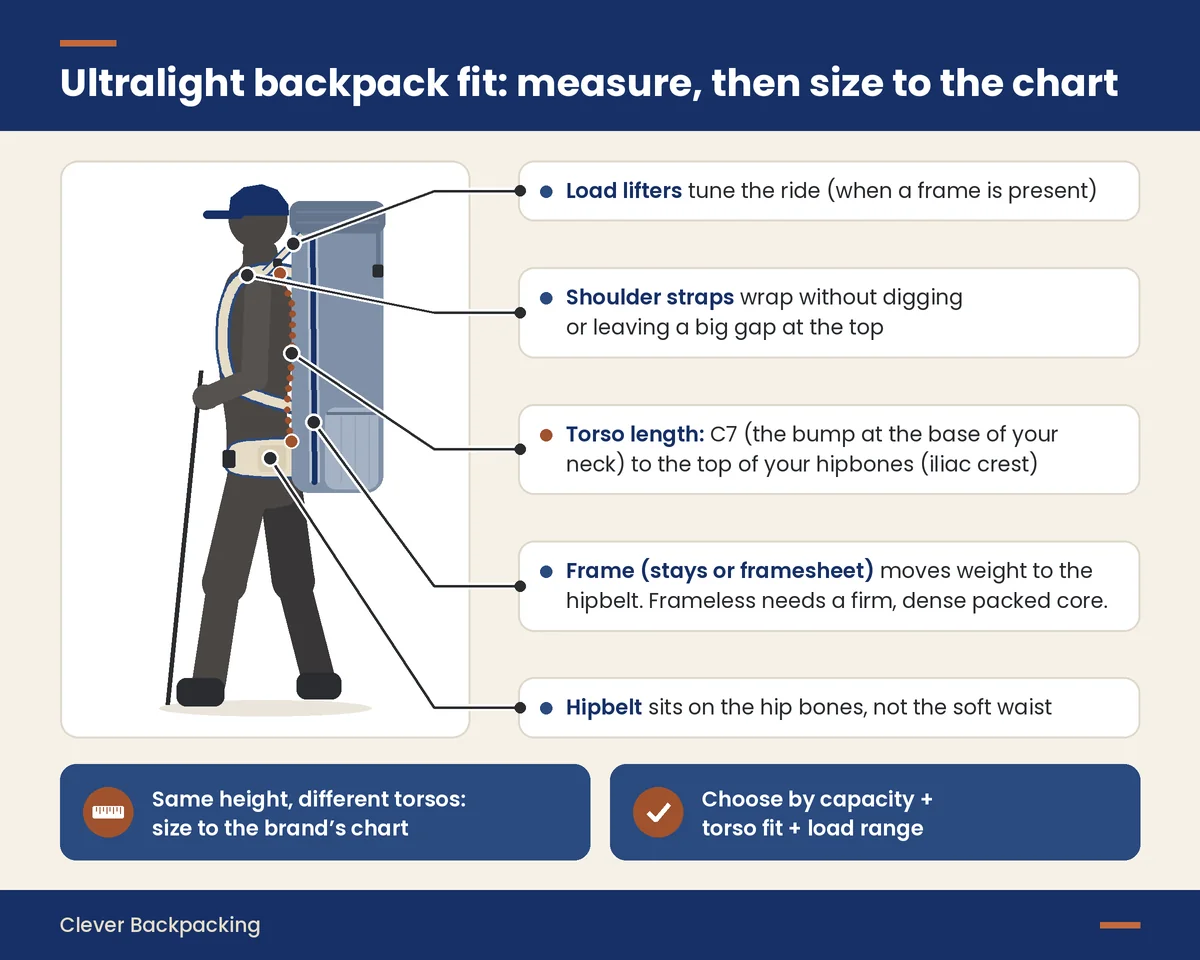
Backpack torso fit is the length from the top of your hipbones (iliac crest) to the C7 vertebra (the bump at the base of your neck). Brands size differently—S/M/L, numeric torso ranges, or adjustable yokes—so measure yourself and compare to the maker’s chart rather than guessing from height alone.
Why fit beats grams:
- A pack that is too long or too short puts load on the wrong places even if it weighs less empty.
- Hipbelt must sit on the hips (bone), not the soft waist, for real transfer.
- Shoulder straps should wrap without digging or leaving a huge gap at the top of the harness.
Try before you buy when you can: load roughly the weight you plan to carry, walk a loop, and notice hot spots. Mail-order works if you know your torso and the return policy—but do not skip measurement because a review said a size “fits most.” Same height, different torsos—size to the chart.
Frame vs frameless (and suspension)
Frameless vs framed backpack is a load and skill choice, not a purity test.
Framed / structured UL packs (stays, framesheet, or similar) help transfer weight to the hipbelt, keep the pack from collapsing into your back, and generally feel better as loads climb. They cost a few ounces versus a pure frameless shell—and often return that cost in comfort.
Frameless packs save weight and shine when the kit is compact, the load stays modest, and you pack carefully (dense core, soft goods as “virtual frame”). They punish heavy, poorly packed loads: the bag becomes a sack on your shoulders.
Suspension details that matter more than marketing: how any frame links to the hipbelt, whether load lifters actually tune the ride, whether the back panel vents or just looks mesh-y, and how stable the pack feels half-empty on day three. Choose the class for the heaviest realistic start-of-trip load—not the lightest resupply day.
Load range vs base weight
This is the decision most shoppers get backward.
Base weight is everything you carry every mile that is not food, water, or fuel. Total pack weight is base + consumables. An ultralight backpack load rating (or the maker’s suggested carry range) is about what the suspension can carry comfortably—not about your aspirational base-weight goal on a spreadsheet.
Practical order:
- Build a realistic kit list (shelter, sleep, clothing, systems).
- Weigh it—kitchen scale, not catalog claims.
- Add food and water for the longest carry you actually do.
- Then pick a pack whose comfort range covers that total—with margin.
Do not buy a frameless UL pack for a heavy traditional kit and hope motivation will shrink the load later. Cut kit first (or accept a framed pack). The ultralight base weight guide owns cut order; Pack Builder owns tracking so you see whether a pack candidate matches the list you already carry.
The Big Three—shelter, sleep, backpack—work as a system. A lighter pack cannot fix an oversized tent and winter bag you never needed. Upgrade order: need → share → then container.
Hipbelt, shoulder straps, and weight transfer
A good hipbelt ultralight pack setup moves most of a reasonable load onto the hips. Shoulder straps stabilize and fine-tune; they should not carry the whole bag for hours if the belt and frame can do the job.
Check hipbelt padding and shape (on bone, not soft waist; removable/stripped belts are specialized, not default); shoulder-strap curve and sternum height; load lifters when a frame is present; and transfer feel—with a realistic load, can you loosen the shoulders slightly and still feel the belt working?
If every mile feels like a shoulder workout, the issue may be fit, packing, or load—not “you need a lighter pack.” Sometimes the fix is a better belt and frame, not fewer ounces of empty fabric.
Features that matter vs features that add ounces
Worth weighing carefully:
- Durable enough bottom and high-wear panels for your bushwhack and airport abuse level
- Side and hipbelt pockets you will actually use for water, snacks, phone, or map
- Easy access (top opening, side zip, or front panel) that matches how you camp
- Solid ice-axe / trekking-pole attachment if you use them
- A lid or roll-top that seals in rain the way you hike (with or without a pack cover / liner)
Often add ounces without adding miles:
- Huge brain compartments you stuff with clutter
- Excessive daisy chains and unused webbing
- Duplicate pockets that invite organization theater
- Heavy frames meant for loads you no longer carry
Materials marketing matters for abrasion and weather—but only after fit and load range. Expedition fabric on a lean weekend kit is often the wrong trade; be honest about terrain and how hard you are on gear.
When NOT to go UL pack
Skip—or delay—an ultralight pack when:
- Loads stay high — heavy food carries, water in dry stretches, group gear, or winter kits that need real transfer.
- You are still cutting kit — beginners mid-shakedown should finish essentials and Big Three decisions before buying a race-weight bag. Start with the essential backpacking gear checklist.
- You need max comfort / injury history — wider belts, more padding, and a supportive frame can be the smart “ultralight adjacent” choice.
- Fit is unknown — if you cannot measure torso or try sizes, do not mail-order the lightest mystery sack.
- Trips are rare / gear is shared — a versatile midweight pack may beat a specialized UL that only shines at a lean base weight.
“When NOT to go UL” is part of choosing well: a comfortable framed pack under a sane kit beats an uncomfortable frameless trophy.
Decision checklist
Before you buy:
- Kit list done? Shelter, sleep, clothing, water, cook, navigation—listed and weighed.
- Base weight known? Same definitions as the base weight guide.
- Longest food/water carry estimated? Pack must handle start-of-trip total, not day-seven fantasy.
- Torso measured? Compared to the brand’s size chart.
- Capacity matched to bulk? Not just weight—insulation and food volume.
- Frame vs frameless chosen for load? Not for forum fashion.
- Hipbelt and shoulders checked with a realistic test load when possible.
- Features trimmed to what you use.
- Logged in Pack Builder so the pack line item sits next to the kit it must carry.
If any of 1–3 are fuzzy, pause the pack purchase.
Build your list in Pack Builder
Once capacity, fit class, and load range are clear, put the ounces next to the kit the pack must carry.
Clever Backpacking’s Pack Builder builds a trip gear list and tracks base weight, consumables, worn weight, and total pack weight separately—so you can see whether a candidate pack’s comfort range matches your start-of-trip total, not an empty-shell goal. Set trip length and conditions, review categories and shakedown ideas, and import/export a LighterPack-compatible CSV if you already keep a list.
That is how “how to choose an ultralight backpack” becomes a number you can defend. Pair with the Ultralight Base Weight Guide; full planner set on the Clever Backpacking tools hub.
Related reading
- Ultralight Base Weight Guide — definitions, ranges, and cut order
- Pack Builder — track base / worn / consumables
- Clever Backpacking tools — all planners in one place
- Essential backpacking gear checklist — kit map before pack shopping
- How to Choose an Ultralight Tent — shelter capacity and structure
- Are Ultralight Tents Worth the Investment? — shelter ROI
- How to Choose the Right Sleeping Bag for Backpacking — sleep system fit and warmth
Fit and load first. Catalog grams second. Tracking always.