Cold soaking is the simplest way to eat on trail without a stove. You put dry food in a jar, add water, close the lid and wait. No flame, no fuel, no pot to scrub. It is a big part of stoveless backpacking, and it is one of the easier ways to trim weight and bulk from a kitchen kit.
It is not magic, though. Cold soaking takes planning, works only with certain foods, and gives you cold dinners on cold nights. This guide covers how it works, the honest trade-offs against carrying a stove, what gear you need, which foods soak well (with realistic soak times from published sources), a handful of simple cold soak recipes, and the food-safety and water-treatment basics.
What cold soaking is and how it works
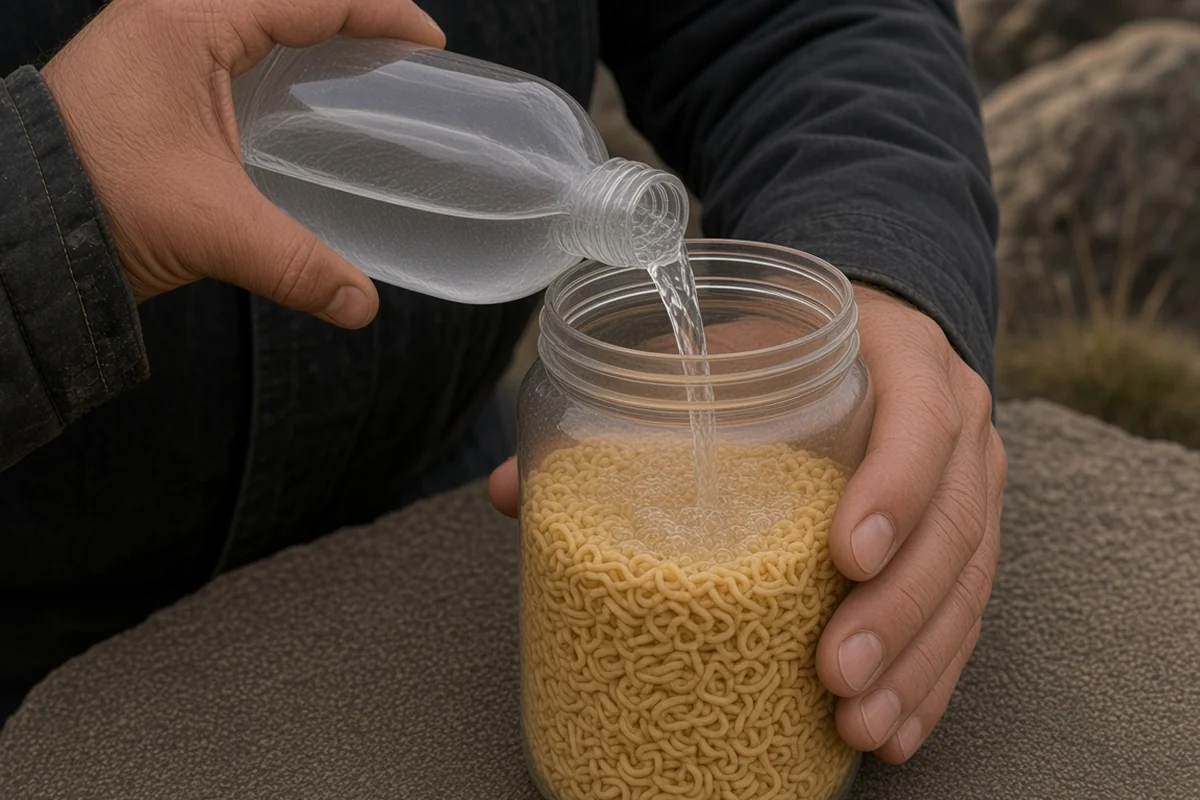
Cold soaking means rehydrating dry food in unheated water. REI Expert Advice describes it as rehydrating a meal “by soaking it in treated water instead of cooking it,” and Backcountry Foodie, a dietitian-run backpacking food site, describes it as using cold or ambient water instead of hot water. You give the food time instead of heat.
The basic method is the same everywhere. REI and SectionHiker both lay out four steps:
- Put the dry food in a leakproof jar.
- Pour in filtered or purified water until the food is covered.
- Wait long enough for it to rehydrate.
- Stir and eat.
The trick is timing. Many hikers start the soak before they stop, so the meal rehydrates in the pack while they walk. REI suggests adding water about 30 minutes to an hour before you expect to reach camp, depending on the food, so dinner is ready when you arrive. For breakfast, a short morning soak works: oats need about 30–60 minutes according to Backcountry Foodie, so you can mix them at camp and eat once you’re packed up, or start them in a pocket and eat at your first break. (Some hikers soak breakfast overnight. See the food-safety section for why we don’t recommend that.)
Cold soaking does not cook food. It only adds water back. That is why it works with foods that are already cooked and dried (instant, par-cooked, dehydrated or freeze-dried) and not with raw grains or dried beans. More on that in the foods section below.
Cold soaking vs a stove: the honest pros and cons
Whether stoveless backpacking makes sense for you depends on the season, where you hike and how much you care about a hot meal. Here is how the trade-offs line up in the sources we reviewed.
Weight and bulk
REI puts the average backpacking cook setup at 16 to 24 ounces. Backpacker says even the lightest kitchen setups can weigh upwards of 10 ounces. A recycled plastic jar is far lighter. SectionHiker lists a common 16-ounce gelato-style jar at 1.9 ounces, and Backcountry Foodie puts a peanut butter jar at about 2 ounces.
The saving is real, but smaller than it first looks. SectionHiker points out that you also carry the water mixed into your soaking meal, and that stoves can be quite light, so the net saving “may only save a bit of weight.” The space saving is easier to notice.
If you track your kit in the Clever Pack Builder, log the jar as base weight and the food and soaking water as consumables. That way the comparison with your stove setup stays honest.
Time and planning
On the trail, cold soaking is fast to “make” but slow to be ready. A stove meal might take 5 to 10 minutes to cook, while a cold-soak meal should be expected to take at least 30 minutes to rehydrate (Cascade Designs / MSR). Backpacker says reconstituting a meal usually takes 30 to 90 minutes, depending on the ingredients.
The payoff is that the waiting happens while you hike. You start the soak at a break and eat when you arrive, with no boiling and almost no cleanup. The catch is that you need water at the right time. MSR notes that you may need to find a water source, then carry that water while the food soaks. SectionHiker’s main warning is simple: don’t forget to start the soak, or you’ll be one hungry hiker.
Fuel and cost
No stove means no fuel to estimate, buy or run out of. SectionHiker calls this leaving “the fuel-guessing game behind.” REI notes that typical stove setups cost upward of $100, compared with a cheap or recycled jar.
Fire bans
During wildfire season, many areas put temporary fire restrictions in place. REI and MSR both note that some areas still allow stoves with an on/off valve, but going stoveless takes the question off the table. Rules vary by place and change during the season, so check current restrictions for your area before every trip.
Smell and wildlife
Soaked food gives off fewer cooking smells than a hot meal, which several sources see as a plus in bear country (SectionHiker; MSR; Backcountry Foodie). It does not replace proper food storage. Follow local rules for canisters, bags or hangs either way.
Morale
This is the big one for many hikers. SectionHiker writes that a warm meal can be “soothing and comforting,” and that cold-soaked dinners can feel more like eating to get it done. The Trek describes cold, wet evenings late in a long hike when a hot dinner would have been the morale boost a tired hiker needed. REI adds that no stove also means no hot coffee. Expect a learning curve too: REI and The Trek both describe early cold-soaked meals coming out crunchy or soupy.
Cold weather and safety
A stove does more than cook. REI notes that warm liquids are a common way to fight hypothermia, and that a stove doubles as a backup water purifier, since boiling makes water safe. MSR makes the same two points. The Trek adds that in winter a stove is how you melt snow for water. That is why most sources treat cold soaking as a better fit for warm, dry seasons than for cold or snowy trips. We cover cold weather in more detail below.
A middle path
You don’t have to choose all or nothing. Backcountry Foodie suggests cold soaking breakfast and lunch while still carrying a stove for dinner if you’re unsure. SectionHiker describes carrying both a stove and a soak jar, and has reviewed a lidded titanium bottle-pot that can soak some meals and cook others. Pre-soaking in cold water before cooking also cuts stove time and fuel (REI, Meal Planning for Ultralight Backpacking).
Cold soak gear: the jar, leak-proofing and a long spoon
Your kit is small: a container, a spoon and a way to keep leaks off your gear.
Choosing a cold soak jar
A good cold soak jar has a few things in common across the sources:
- Leakproof, with a twist-on lid. The food soaks while you hike, so a leak can soak the rest of your pack. MSR calls for a leakproof, twist-top container made of sturdy material.
- Wide enough to fill, eat from and clean. SectionHiker says the jar should be large and wide enough for your meal, and not so tall that your spoon can’t reach the bottom.
- Big enough for the food to expand. Couscous and noodles swell a lot. Backcountry Foodie notes that half a cup of dry couscous makes more than a cup once soaked, and shows a jar that was nearly too small once the noodles rehydrated. Leave headspace.
- Easy to clean inside. Backcountry Foodie suggests avoiding jars with ridges at the bottom, and making sure your hand fits inside for scrubbing. SectionHiker also notes that grooves at the base are hard to keep clean.
Common container types:
- Gelato-style plastic jars. SectionHiker calls this “one of the most commonly used” containers on trail. It lists the 16-ounce size (473 ml) at 1.9 ounces, and notes a 32-ounce size for bigger meals that weighs not much more.
- Plastic peanut butter jars. Backcountry Foodie lists a typical jar at about 2 ounces and about 750 ml. SectionHiker notes that some are taller and narrower, so check that the mouth is wide enough to scoop from.
- Screw-top plastic food containers. Backcountry Foodie lists a light, wide-mouth twist-lid storage container at about 1 ounce and 437 ml.
- Lidded titanium bottle-pots. These cost far more, but one pot can soak some meals and cook others (SectionHiker; Backcountry Foodie). MSR notes that one such pot’s screw-on lid isn’t always leakproof. SectionHiker’s 2024 review of a newer version with a gasket found no leaks, even carried on its side, and noted that older versions without gaskets did leak. Either way, test before trusting one inside your pack.
Skip glass. SectionHiker advises against it because it is heavier and can break. For size, SectionHiker’s author started with the 16-ounce jar, sometimes wished it were bigger, and moved up to the 32-ounce size for larger meals.
Leak-proofing
Test any jar at home before a trip. Fill it with water, close it, turn it upside down and shake it (SectionHiker advises testing for leaks before you go). On trail, many hikers keep the jar upright in an outside pocket. SectionHiker carries hers in the pack’s front mesh pocket. For extra insurance, Backcountry Foodie suggests keeping the jar inside a sealed zip-top bag. The same bag can be odor-proof in bear country.
A spoon that reaches the bottom
Your spoon has to reach the bottom of the jar (SectionHiker). With a short gelato-style jar, a normal camp spoon is usually enough. With a taller peanut butter jar or a pouch, a long-handled spoon is easier.
Cleaning the jar
Several simple routines appear in the sources:
- Add a little treated water after eating, close the lid and shake. The Trek describes this quick rinse, and SectionHiker drinks the rinse water.
- Wipe out the last bits and pack out the wipe, so you aren’t sealing up a wet, dirty jar. SectionHiker says this matters most in hot weather.
- Backcountry Foodie adds a few drops of biodegradable soap and about an ounce of water, and lets the jar “swish” itself clean while hiking. A quick rinse later gets it ready for the next meal.
SectionHiker also notes that it is hard to know how sanitary a plastic jar really gets, while boiling water in a pot helps disinfect it. That is one more reason to keep soaking times short and the jar dry between meals.
Cold soak backpacking food: what works, what doesn’t, and how long it takes
The rule of thumb is simple: if it’s already cooked and dried, it will probably soak. If it needs simmering, it probably won’t. REI notes that the crunchier the raw food, the longer it takes to rehydrate, and that smaller pieces (macaroni rather than spaghetti) soak faster than big ones. Backcountry Foodie suggests checking the package directions: if a meal says to simmer for several minutes, it likely needs real cooking.
How long cold soaking takes, by food
Soak times vary with the brand, how finely the food is broken up, the water temperature and the air temperature. Treat the table below as a starting point, then test at home. Where sources differ, we show the spread.
| Food | Typical cold-soak time | Source(s) |
|---|---|---|
| Instant mashed potatoes | Ready almost right away | REI (“0 minutes”); Backcountry Foodie (“instant”); Backpacker (“within a few minutes”) |
| Instant hummus powder | About 1 minute (stir well) | Backcountry Foodie |
| Couscous | About 5–10 minutes; about 20 minutes in one recipe with added chickpeas | REI; Backcountry Foodie; Backpacker recipes |
| Chia seeds | About 15 minutes | Backcountry Foodie |
| Dehydrated refried beans | About 5–30 minutes (Backcountry Foodie says about 20) | REI; Backcountry Foodie; Backpacker (“within a few minutes”) |
| Dehydrated vegetables | About 10–30 minutes | REI |
| Ramen noodles | About 20–30 minutes | REI; Backcountry Foodie; Backpacker and SectionHiker (about half an hour) |
| Oats | About 30–60 minutes | Backcountry Foodie |
| Instant or precooked dehydrated quinoa | About 30–60 minutes | Backcountry Foodie |
| Par-cooked rice ramen | About 45–60 minutes | Backcountry Foodie |
| Pre-cooked, dehydrated pasta or boxed mac and cheese pasta | About 1 hour for mac and cheese; 1–2 hours or longer for pasta | Backpacker; REI |
| Dehydrated chickpeas (garbanzo beans) | About 90–120 minutes; Backcountry Foodie says beans in general can take up to 2 hours | Backcountry Foodie |
SectionHiker’s author doesn’t fuss over exact minutes. She gives most meals at least an hour. MSR’s general guidance is to cover the food, add a little extra water, and wait at least 30 minutes. Backcountry Foodie sums up the typical range as 15 to 45 minutes for most meals, with beans taking up to two hours.
Backpacker suggests a smart habit: once you’ve worked out how long a meal needs at home, write the soak time on its bag. On trail you’ll know at a glance whether to start it at your last break or wait until camp.
Foods that soak well
These come up again and again across REI, SectionHiker, MSR, Backpacker and Backcountry Foodie:
- Breakfast: oats and quinoa flakes, chia seeds, grits, breakfast and milk powders (add milk powder at mealtime; see the food-safety section)
- Lunch and dinner: ramen, couscous, instant mashed potatoes, dehydrated refried beans, hummus powder, falafel mix, creamy or bean soup mixes, polenta, freeze-dried vegetables and fruit, pre-cooked dehydrated pasta, and textured vegetable protein (TVP)
- Add-ins that need no soaking: olive oil, nut butter, nutritional yeast, powdered butter, spices and condiment packets
On TVP: Trail.Recipes says it rehydrates with about an equal amount of water, hot or cold, and that smaller pieces absorb water faster than bigger chunks. Backcountry Foodie lists it among its top cold-soak picks. We didn’t find a published cold-soak time we trust, so test your brand at home.
MSR suggests that beginners keep a few near-instant foods, like mashed potatoes and refried beans, on hand. That way you can still eat if a more complicated meal doesn’t work out.
Foods that soak badly
- Raw rice, regular pasta, regular (uncooked) quinoa, and dried beans or lentils. These need heat. SectionHiker’s author says regular quinoa doesn’t cold soak, though she uses quinoa flakes, and Backcountry Foodie gives instant quinoa about 30–60 minutes. Backcountry Foodie says regular pasta and most rice noodles stay crunchy even after hours of soaking, unless they were pre-cooked and dried. MSR says most hikers find cold-soaked rice and pasta not very palatable.
- Most freeze-dried “just add boiling water” meals. SectionHiker and Backcountry Foodie say most commercial backpacking meals are designed for boiling water and don’t rehydrate properly cold. Backpacker is a little more open: hikers can use some prepackaged meals, but many need heat to rehydrate the rice and other ingredients together.
- Jerky and dried meats. Backcountry Foodie says these stay chewy even after hours of soaking. Add them on top instead of soaking them.
- Dehydrated peas, corn and carrots. Backcountry Foodie says these partly rehydrate but stay chewy in the middle, and suggests freeze-dried versions instead. The Trek also flags dehydrated corn and mushrooms.
- Whole chickpeas with skins. Backcountry Foodie found that the skins come off and turn the soak into a starchy sludge. Skinned or instant chickpeas work better.
Mixed results: instant rice. Backpacker says instant rice can take closer to two hours, and its Spanish rice recipe soaks for 1.5 hours. The Trek’s author lists instant rice dishes among her favorite cold-soaked meals, though one early attempt came out crunchy with too little water. SectionHiker, on the other hand, says instant rice doesn’t work with cold soaking. If you want to try it, test at home first and add enough water.
Powders that clump: Backcountry Foodie suggests making a paste with a little water first for milk and drink powders, then adding the rest. It also says coconut milk powder tends to stay gritty in cold water.
Simple cold soak recipes for breakfast, lunch and dinner
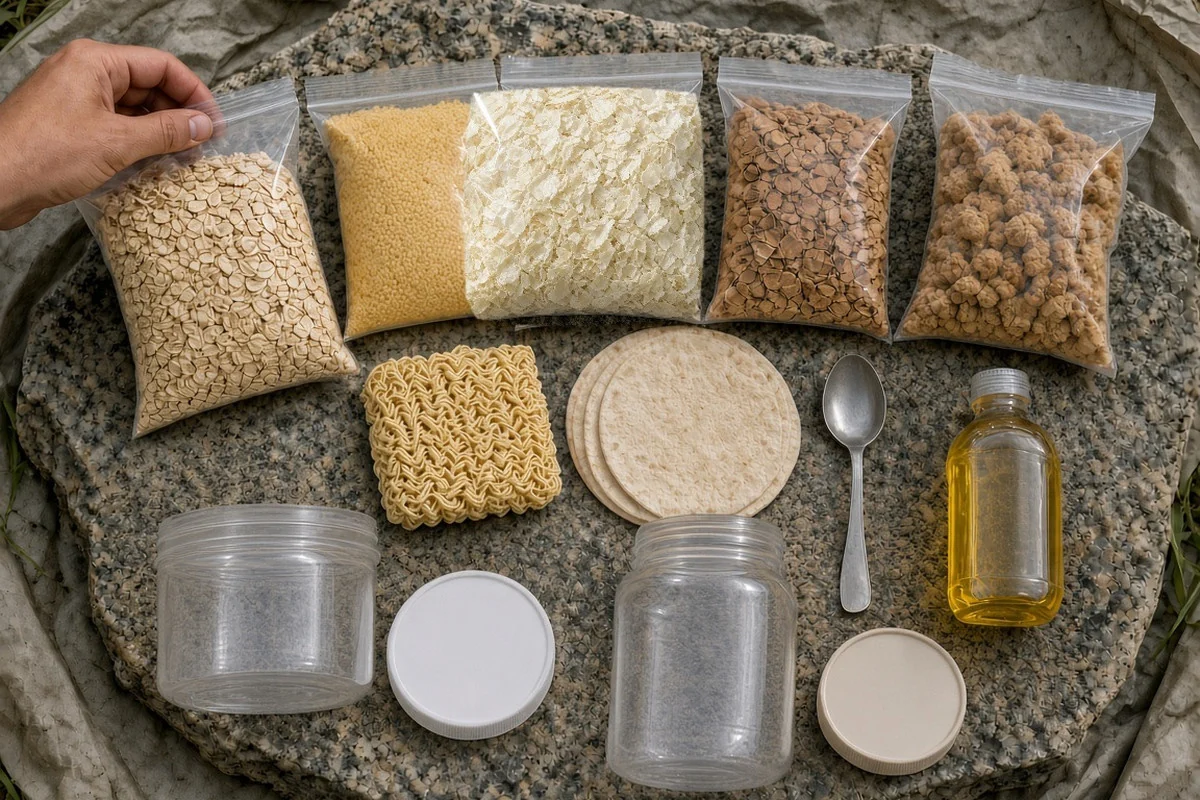
These no-cook backpacking meals are built from easy-to-find dry foods. Amounts are rough guides for one person, so adjust them to your appetite and your jar size. Soak times follow the sources in the table above. Your first try should be in your kitchen, not at a trailhead (REI, SectionHiker and Backpacker all recommend practicing at home).
We have not listed calories, because they depend on your exact brands and portions. Enter your actual foods in the Clever Trail Fuel Planner to see calories, total food weight and calories per ounce for the whole trip.
1. Morning soaked oats (breakfast)
- About ½ to 1 cup rolled or quick oats
- Dried fruit, nuts or seeds, cinnamon, and chia seeds if you like
- A spoonful or two of milk powder or protein powder, added at breakfast
In the morning: Put the oats and dry add-ins in the jar, cover with treated water plus a little extra, and close the lid. Oats need about 30–60 minutes according to Backcountry Foodie, so start them while you break camp, or carry the jar and eat at your first break. Stir in the milk or protein powder just before eating. Backcountry Foodie advises adding dairy right before you eat, and Clemson Extension notes that milk powder, once mixed with water, should be handled like fresh milk. Make a paste with a splash of water first so it doesn’t clump. Add a spoonful of nut butter for richness.
2. Hummus wraps (lunch)
- A few spoonfuls of instant hummus powder
- Olive oil
- Tortillas, chips or crackers
Stir the powder with a little water until it reaches the thickness you like. Backcountry Foodie says hummus mix is ready in about a minute and suggests stirring well and adding olive oil for extra calories. Spread it on a tortilla or scoop it with chips, a pairing SectionHiker suggests.
3. Bean and TVP burrito bowl (lunch or dinner)
- About ½ cup dehydrated refried bean flakes
- A small handful of TVP, if you like
- Taco seasoning or hot sauce packets, plus a tortilla or corn chips
Break the bean flakes into small pieces first. Backcountry Foodie says this gives the best rehydration. Cover with water and soak. Refried beans take about 5–30 minutes (REI). If you add TVP, Trail.Recipes says it rehydrates with about an equal amount of water, hot or cold, and that smaller pieces absorb faster. Test the soak time for your TVP at home. Season and wrap, or eat with chips.
4. Cold ramen noodle salad (dinner)
- 1 package ramen, broken up
- A spoonful or two of freeze-dried vegetables
- A foil packet of tuna or chicken and a mayonnaise packet, added at the end
- Some of the seasoning packet, or your own spices
Put the noodles and vegetables in the jar and cover with water. Ramen needs about 20–30 minutes (REI; Backcountry Foodie), and breaking up the noodles speeds things up. Drain any extra water, then stir in the seasoning, tuna and mayo just before eating. This follows the basic idea of Backpacker’s cold-soaked tuna pasta salad. Backcountry Foodie advises adding proteins like tuna or chicken packets right before you eat, rather than soaking them.
5. Mediterranean couscous (dinner)
- About ⅓ to ½ cup couscous
- Raisins or other dried fruit, nuts, and dried herbs
- Olive oil, and a foil packet of tuna or salmon if you like
Add the couscous and dried fruit to the jar, cover with water and close. Plain couscous needs about 5–10 minutes (REI; Backcountry Foodie). Backpacker’s couscous salad, which adds chickpeas, soaks for about 20 minutes. Couscous more than doubles in volume (Backcountry Foodie), so leave room. Drain, then stir in oil, herbs and fish. SectionHiker suggests pairing couscous with a fish packet, dried fruit and nuts.
6. Loaded mashed potatoes (dinner)
- About ¾ to 1 cup instant mashed potato flakes
- Olive oil or powdered butter, nutritional yeast, salt and pepper
- Jerky or other shelf-stable meat, torn up and sprinkled on top
Mashed potato flakes are ready almost as soon as you stir in water (REI; Backcountry Foodie), so this is the fallback meal MSR suggests keeping on hand. Add water a little at a time and stir well. Add oil and nutritional yeast, then sprinkle jerky on top instead of soaking it, since Backcountry Foodie notes that jerky stays chewy in water.
More cold-soak recipes
For more measured recipes from outside sources, try these four. Each opens in a new tab.
- Backpacker’s three cold-soaked recipes: a Spanish rice medley, a couscous chickpea salad and a tuna pasta salad, each with ingredients and in-camp soak steps.
- The Trek’s cold-soak meals from basic resupply ingredients: simple meals a thru-hiker built from grocery-store and hiker-box foods.
- Backcountry Foodie’s nut butter morning oats: a dietitian-written cold-soak breakfast with water amounts, soak time and food-safety notes.
- Fresh Off the Grid’s cold soak cowboy caviar: a no-stove bean salad you dehydrate at home and soak on trail.
Food safety and water treatment
Cold soaking means food sits wet and unheated in a sealed jar, sometimes on a sunny pack pocket. A few basic rules make that safer.
Keep soaks short
The USDA Food Safety and Inspection Service says most bacteria grow rapidly between 40 °F and 140 °F, the “Danger Zone,” and that bacteria can reach dangerous levels after 2 hours (1 hour if 90 °F or above). Backcountry Foodie applies the same limits to cold soaking: don’t let meals soak longer than 2 hours in warm weather, or 1 hour above 90 °F. Under the USDA guidance, that 2-hour clock runs whenever the food is above 40 °F, not only on hot days, which covers most trail days. REI similarly warns that leaving food in lukewarm conditions invites bacterial growth, and points readers to USDA guidance.
In practice, that means:
- Start the soak close to when you’ll eat, not first thing in the morning for dinner.
- Don’t save leftovers (Backcountry Foodie). Eat it all, or pack out what’s left in your trash.
- Add perishable extras like tuna, chicken packets, mayo or cheese just before eating, not at the start of the soak (Backcountry Foodie).
- Overnight soaks: some hikers soak breakfast overnight (SectionHiker; MSR). That falls outside the USDA guidance, because USDA treats food as out of the Danger Zone only below 40 °F. We recommend the 30–60 minute morning soak in Recipe 1 instead. If you do soak overnight, keep dairy and other perishables out until morning, and store the jar with your food in a bear canister, food bag or hang, following local rules.
Clean hands, clean jar
USDA FSIS advises washing your hands with soap and water before and after handling food, or using a hand sanitizer with at least 60% alcohol. It also suggests carrying wipes, sanitizer or biodegradable soap for hand and dishwashing. Keep the jar clean and dry between meals, using the routines in the gear section above.
Treat your soaking water
Soaking doesn’t heat the water, so it doesn’t make untreated water safe. Use only treated water, just as you would for drinking (REI; SectionHiker). The CDC notes that you can get sick from untreated water used to cook, not only to drink, and that clear stream water can still carry germs. Its guidance:
- Boiling is the best way to kill germs: a rolling boil for 1 minute, or 3 minutes above 6,500 feet.
- If you can’t boil, the next best option is to filter, then disinfect the filtered water.
- The CDC says most portable water filters will remove parasites, but not viruses or bacteria. Only filters with an absolute pore size of 0.3 micron or smaller remove bacteria, and those still don’t remove viruses. Chemical disinfectants kill viruses and bacteria but may not kill parasites. That is why the CDC recommends filtering first, then disinfecting.
Without a stove, you lose boiling as a backup. REI, SectionHiker and MSR all point out that a stove doubles as a backup water purifier. If you go stoveless, think about a lightweight backup treatment, such as a few spare chemical tablets, in case your main filter fails. Keep the CDC’s caveat in mind: chemical tablets alone may not kill every parasite. Follow the product’s stated wait time before using the water.
Cold soaking tips for cold weather and long trips
In cold weather
- Be honest about the season. REI notes that a stove can be a safety tool in cold conditions, because warm liquids help fight hypothermia. SectionHiker says hikers who chill easily or take many cold-weather trips may not love cold soaking. Where snow is your only water source, The Trek notes that you need a stove to melt it.
- Keep the jar from freezing. Backcountry Foodie suggests storing the soak jar in the middle of your pack, inside a sealed bag in case it leaks.
- Allow extra time. The sources we reviewed don’t say what water or air temperature their soak times assume. SectionHiker keeps her jar in the outside mesh pocket so the sun can help. In cold weather, allow extra time and check the texture before you eat.
- Consider a hybrid. For shoulder-season trips, the middle path above (cold soak by day, stove for a hot dinner) keeps a source of heat in your kit.
On long trips
- Run a weekend test first. REI suggests trying your cold-soak system over a weekend before relying on it for a long trip. It is better to find out you can’t stomach cold food close to home.
- Plan for variety and protein. Many packaged foods lean toward carbs. REI suggests carrying jerky, salami, tuna, nuts and nut butters, and adding some to your soaked meals. Garage Grown Gear’s stoveless write-up describes widening a cold-soak menu with dried fruits and vegetables, nuts, seeds, hard cheese, cured meats and powders, to avoid days of the same bland meals.
- Carry flavor. REI suggests packing sauces, seasonings and condiments to add flavor to cold-soaked meals.
- Use bulk bins for resupply. REI and SectionHiker point to bulk sections, co-ops and health food stores for refried beans, dehydrated vegetables and soup mixes. These make resupplies more varied and let you buy the portion you need.
- Pack enough food. A jar of soaked couscous can look like more food than it is. Use our guide to how much food per day backpacking for daily calorie and weight ranges, then build the trip’s food bag in the Clever Trail Fuel Planner.
Who cold soaking suits best
Cold soaking suits hikers who want a lighter, simpler kitchen and hike mostly in warm or dry seasons. It also suits anyone dealing with fire restrictions, or who would rather walk than wait for water to boil. It is a weaker fit if a hot dinner is what keeps you going, if you hike in the cold, or if you rely on boiling as your water backup.
If you’re curious, start small. Cold soak one breakfast or lunch on your next overnight, keep your stove for dinner, and see how it goes. When you settle on a setup, add the jar and spoon to your list in the Clever Pack Builder, and check the rest of your kitchen against the ultralight backpacking gear list.
Looking for more trip planners? See all of the Clever Backpacking tools.
Sources
All sources were opened on November 11, 2026. Dates are the visible page dates where shown; “n.d.” means no date was shown.
- REI Expert Advice, A Guide to Cold Soaking Your Food (Mary Beth Skylis; n.d., accessed Nov 11, 2026). Cook-kit weight of 16–24 oz, cost, fire bans, hypothermia, backup purifier, method, soak times, food selection, food safety.
- REI Expert Advice, Meal Planning for Ultralight Backpacking (n.d., accessed Nov 11, 2026). Cold-soak foods; pre-soaking to save fuel.
- SectionHiker, Cold-Soak No-Cook Backpacking Meals 101 (Heather Daya Rideout; first published 2021, republished March 3, 2026). Method, weight caveat, fuel, bears, morale, jar criteria and sizes, 1.9 oz jar weight, no glass, timing, food list, regular quinoa and instant rice “don’t work” (the author clarifies in the comments that she meant regular quinoa and uses quinoa flakes), cleaning.
- SectionHiker, Vargo BOT 700 Review (published Feb 28, 2024; modified Nov 17, 2024). Hybrid soak/cook pot, and the newer gasketed version not leaking (described generically in the body).
- Cascade Designs / MSR, Everything You Need to Know About Cold Soak Backpacking Meals (Mary Beth Skylis; originally published July 21, 2022; updated). 5–10 min stove vs at least 30 min soak, fire restrictions, smell, safety, jar qualities, water ratio, beginner fallback foods.
- Backcountry Foodie, Cold Soaking Backpacking Meals: Guide for Stoveless Hikers (Aaron Owens Mayhew, MS, RDN; updated September 2, 2026). Soak times including instant quinoa and chickpeas, container weights and volumes, foods that soak badly, 2 h / 1 h above 90 °F soaking limit, leftovers, adding dairy and proteins right before eating, winter jar storage, soap cleaning.
- Backpacker, Cut Your Pack Weight, Not Your Calories, With Cold-Soaked Trail Meals (published May 11, 2022; originally August 2021). Kitchen setups of 10+ oz; 30–90 min soaks; ramen, mac and cheese and instant rice times; label soak times; practice at home.
- Backpacker, 3 Delicious Cold-Soaked Recipes You Can Make Without a Stove (updated July 7, 2025). Couscous about 20 min with chickpeas; instant rice 1.5 h; ramen tuna salad about 30 min.
- The Trek, Going Stoveless: The Pros and Cons of Cold Soaking (Diane Duffard; June 21, 2023). Morale, learning curve, instant rice dishes that can work, foods that fail, melting snow, rinse cleanup.
- Garage Grown Gear, Ditch Your Stove: The Case for Cold Soaking & Eating Raw! (Ali Becker; Sept 17, 2021). Menu variety on long trips; fire-ban stove policies.
- Trail.Recipes, Textured Vegetable Protein (TVP) (Aug 7, 2024). TVP rehydrates with about equal water, hot or cold; small pieces are faster.
- USDA FSIS, Food Safety While Hiking, Camping & Boating (last updated June 4, 2024). 40–140 °F Danger Zone (out of the zone only below 40 °F); 2 h / 1 h at 90 °F+; handwashing; sanitizer with at least 60% alcohol; shelf-stable foods.
- Clemson Cooperative Extension (HGIC), Safe Handling of Milk & Dairy Products (originally published May 1999; page modified June 19, 2025). Reconstituted nonfat dry milk “is handled like fresh fluid milk.”
- CDC, About Water Treatment Options When Hiking, Camping, or Traveling (Jan 30, 2025). Boiling (1 min; 3 min above 6,500 ft); filter then disinfect; most portable filters don’t remove viruses or bacteria (0.3-micron exception for bacteria); chemical limits on parasites; follow product instructions; untreated water used for cooking.